
Ornament Wreath Tutorial
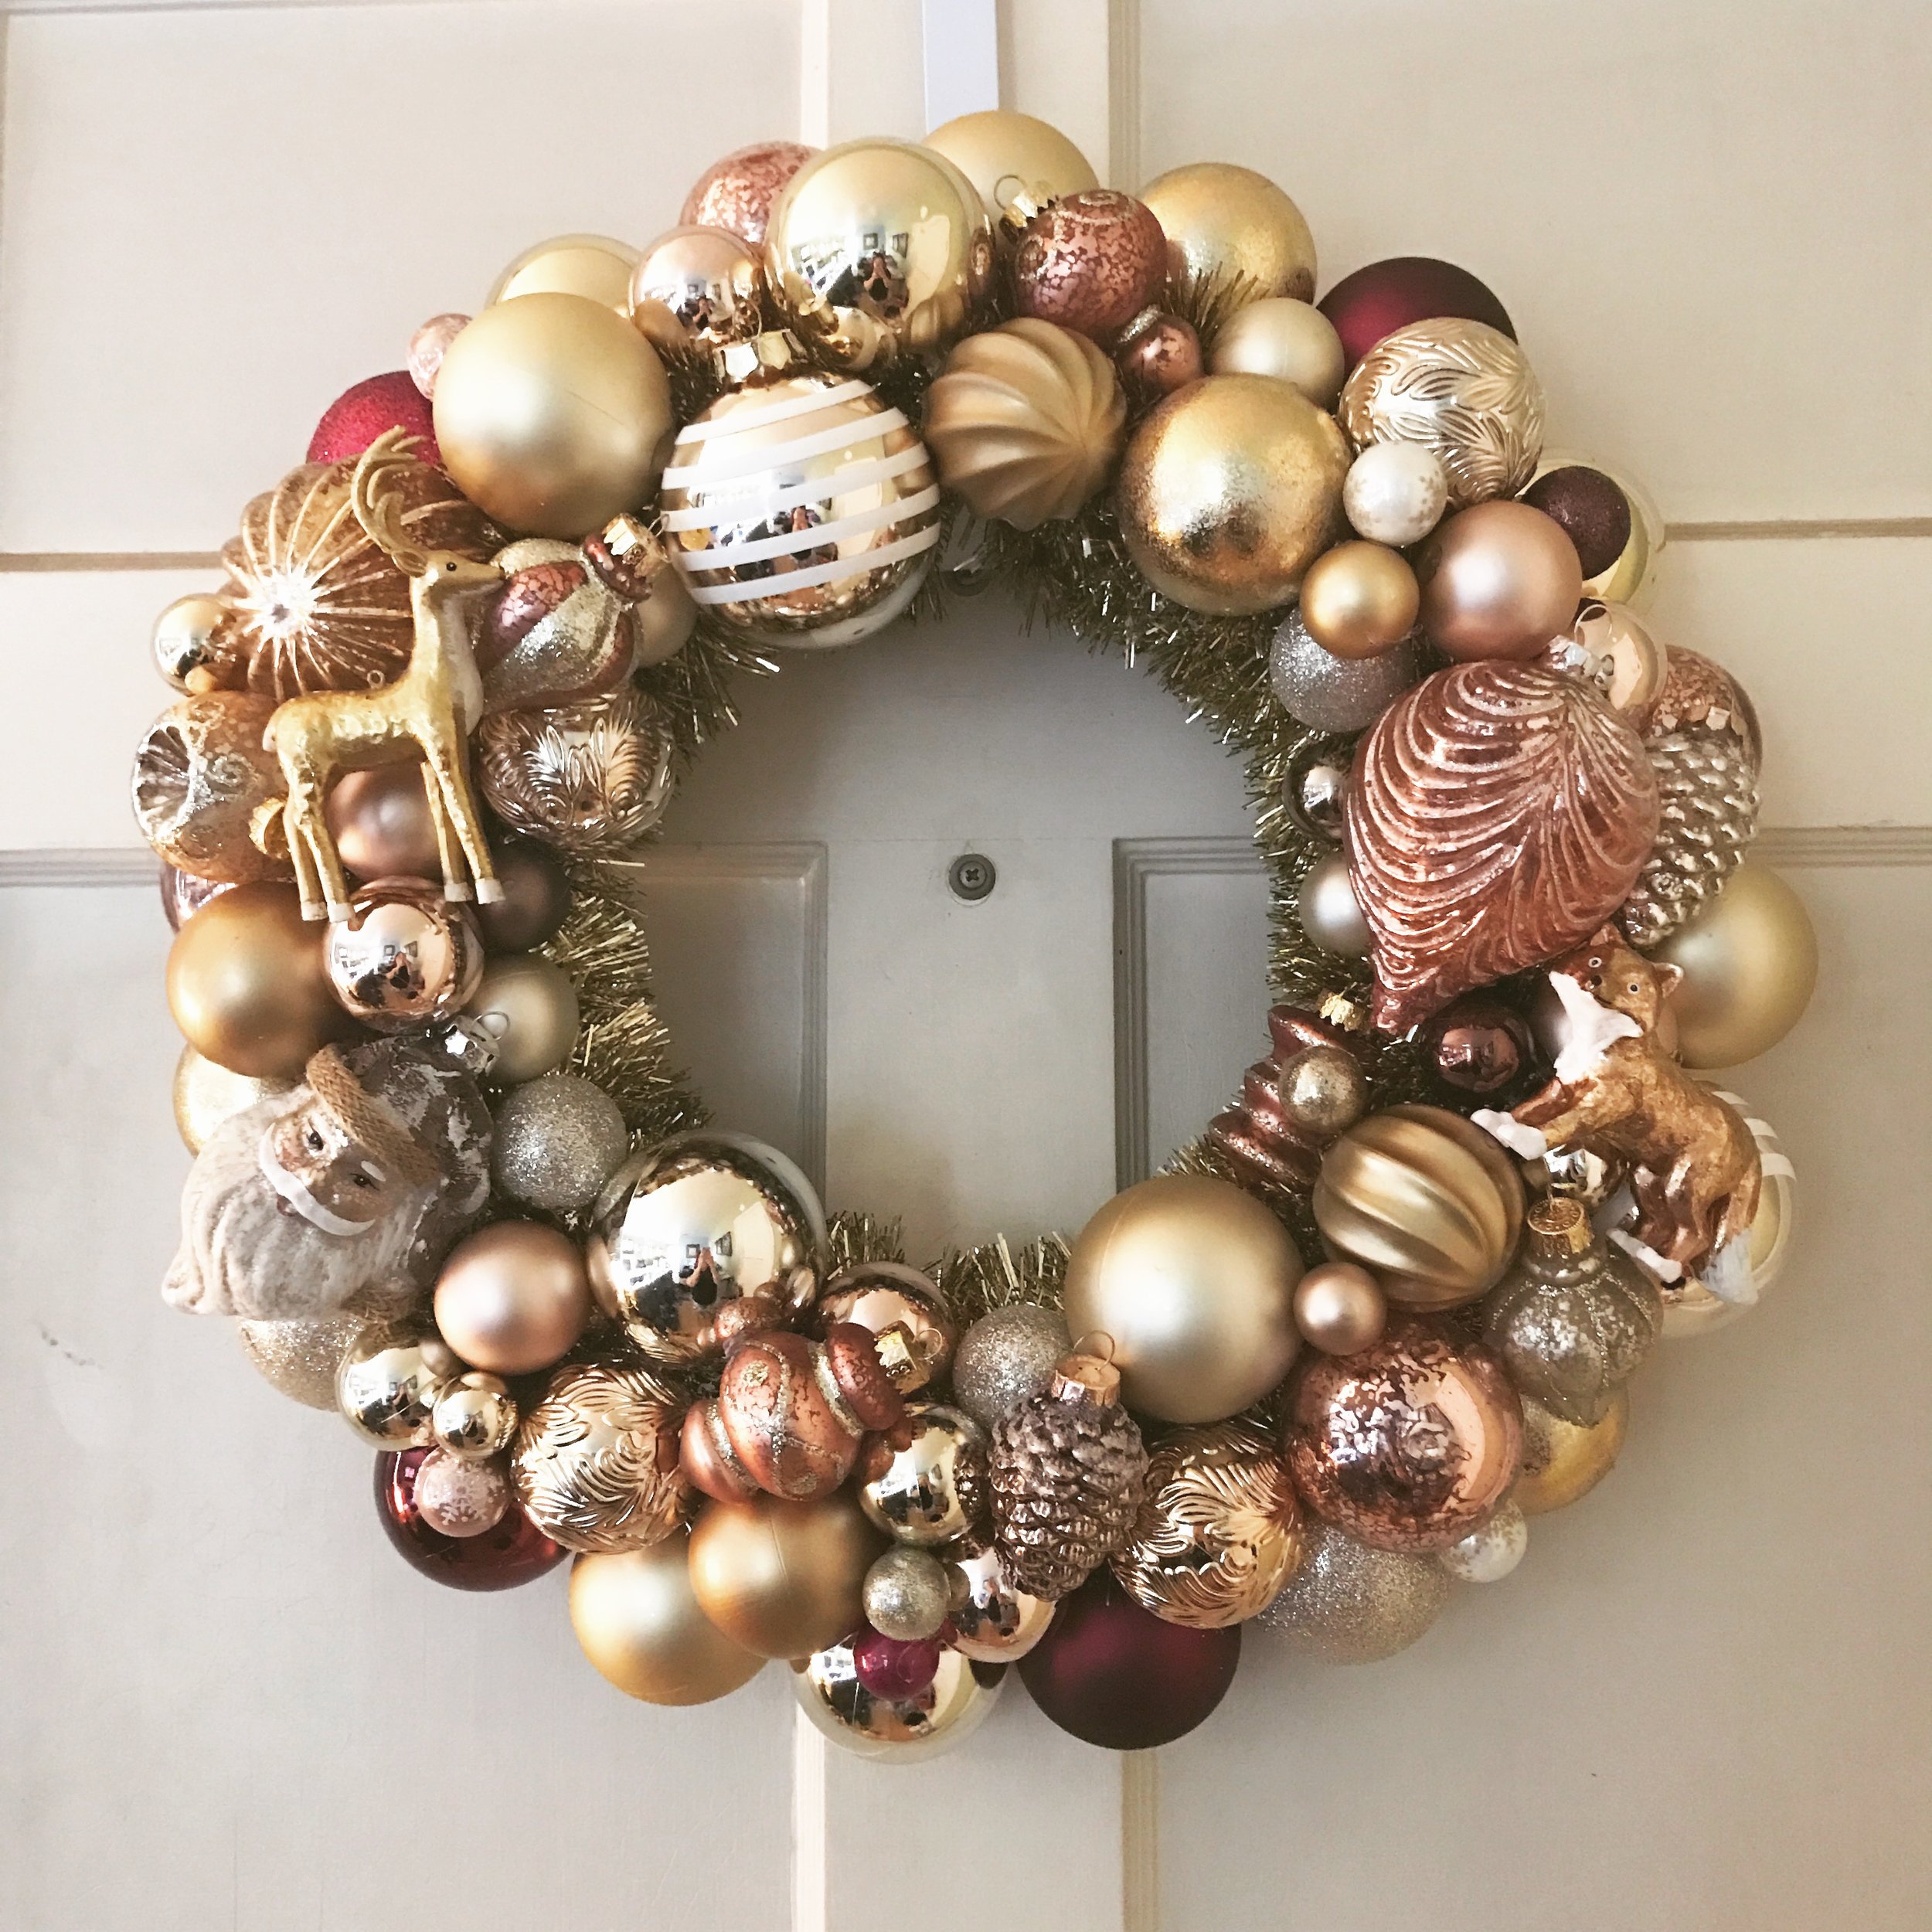
/Happy Holidays!! Every year around this time, families across the world are decorating their homes for Christmas and other winter holidays. We all want that decor that is going to stand out and be a little different from everyone else. If you can personalize it, even better! In years past I have made ornament wreaths in various color schemes to match that year’s decor. I have even gotten my kids involved and let them choose the colors or ornaments based on interests. This year I am using my rose gold wreath on the mantle.
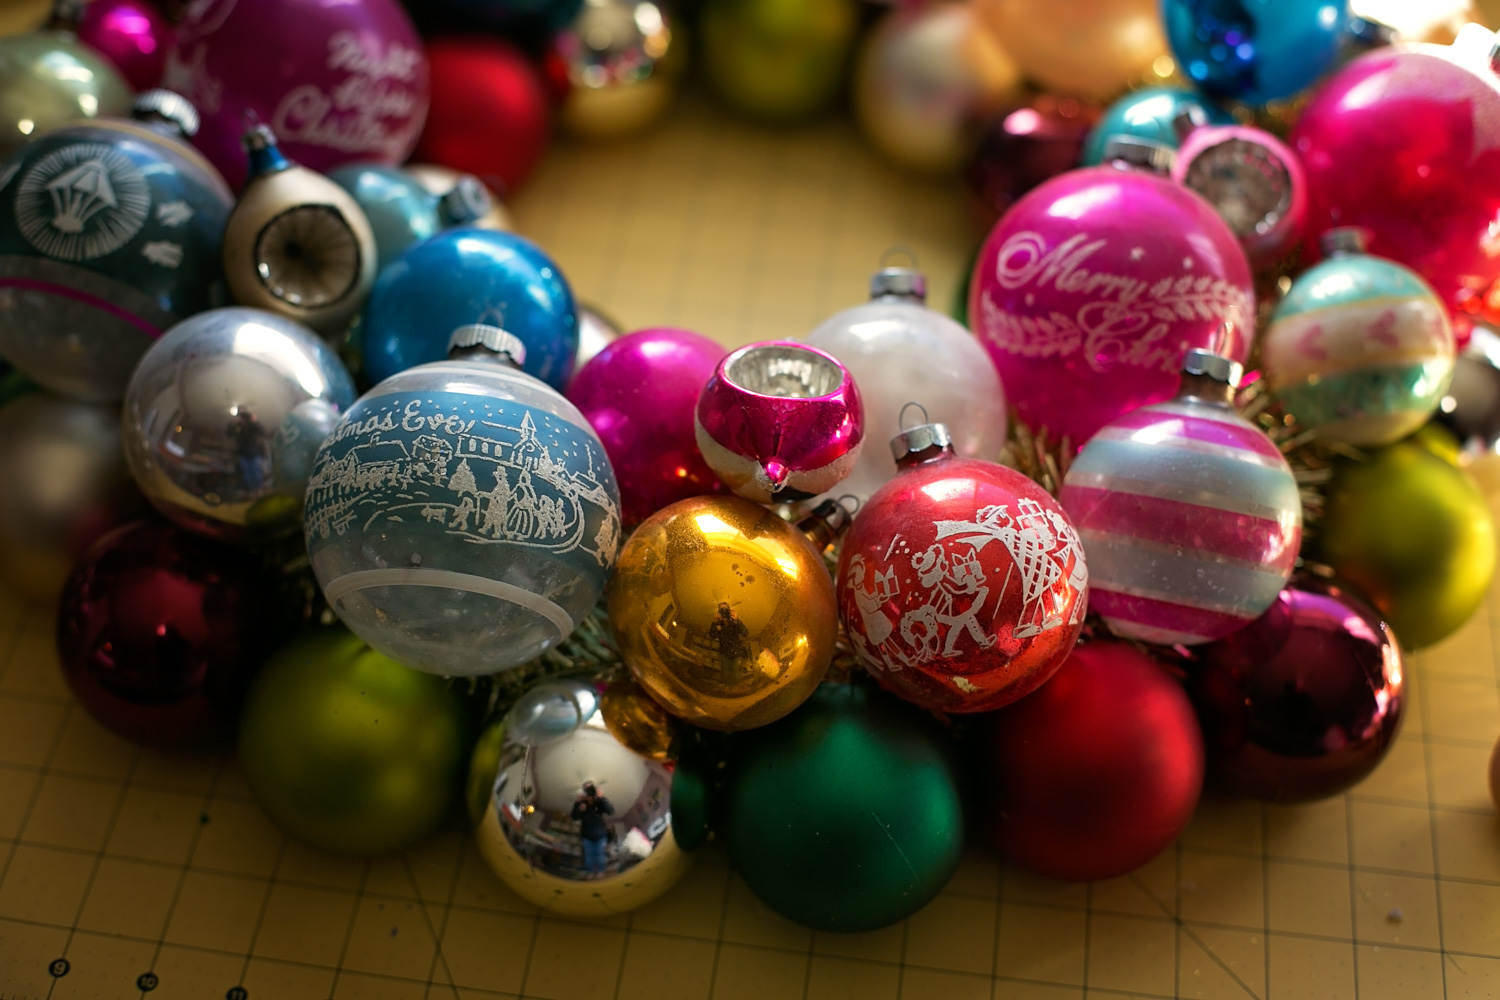
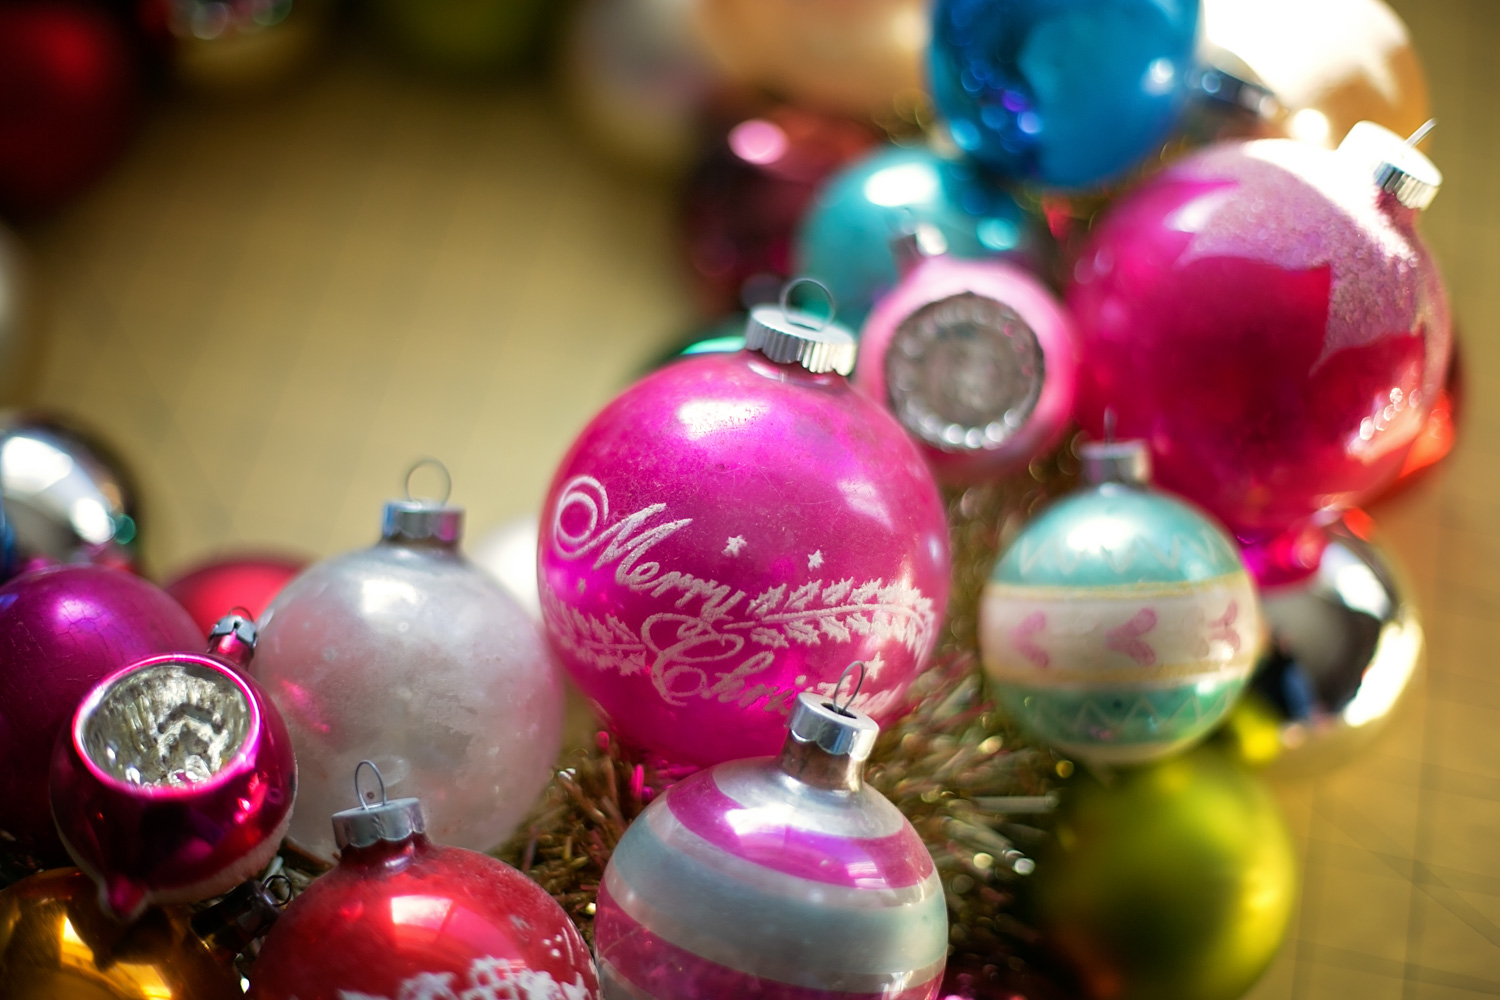
While I was back home for Thanksgiving, I grabbed a bunch of my mom’s vintage ornaments that belonged to her mom and grandma. She has never really used them and they have just been sitting in the attic gathering dust for the last 10+ years, so I decided to rescue them and make a memory wreath for her. This way she can actually display them and enjoy them.
Materials:
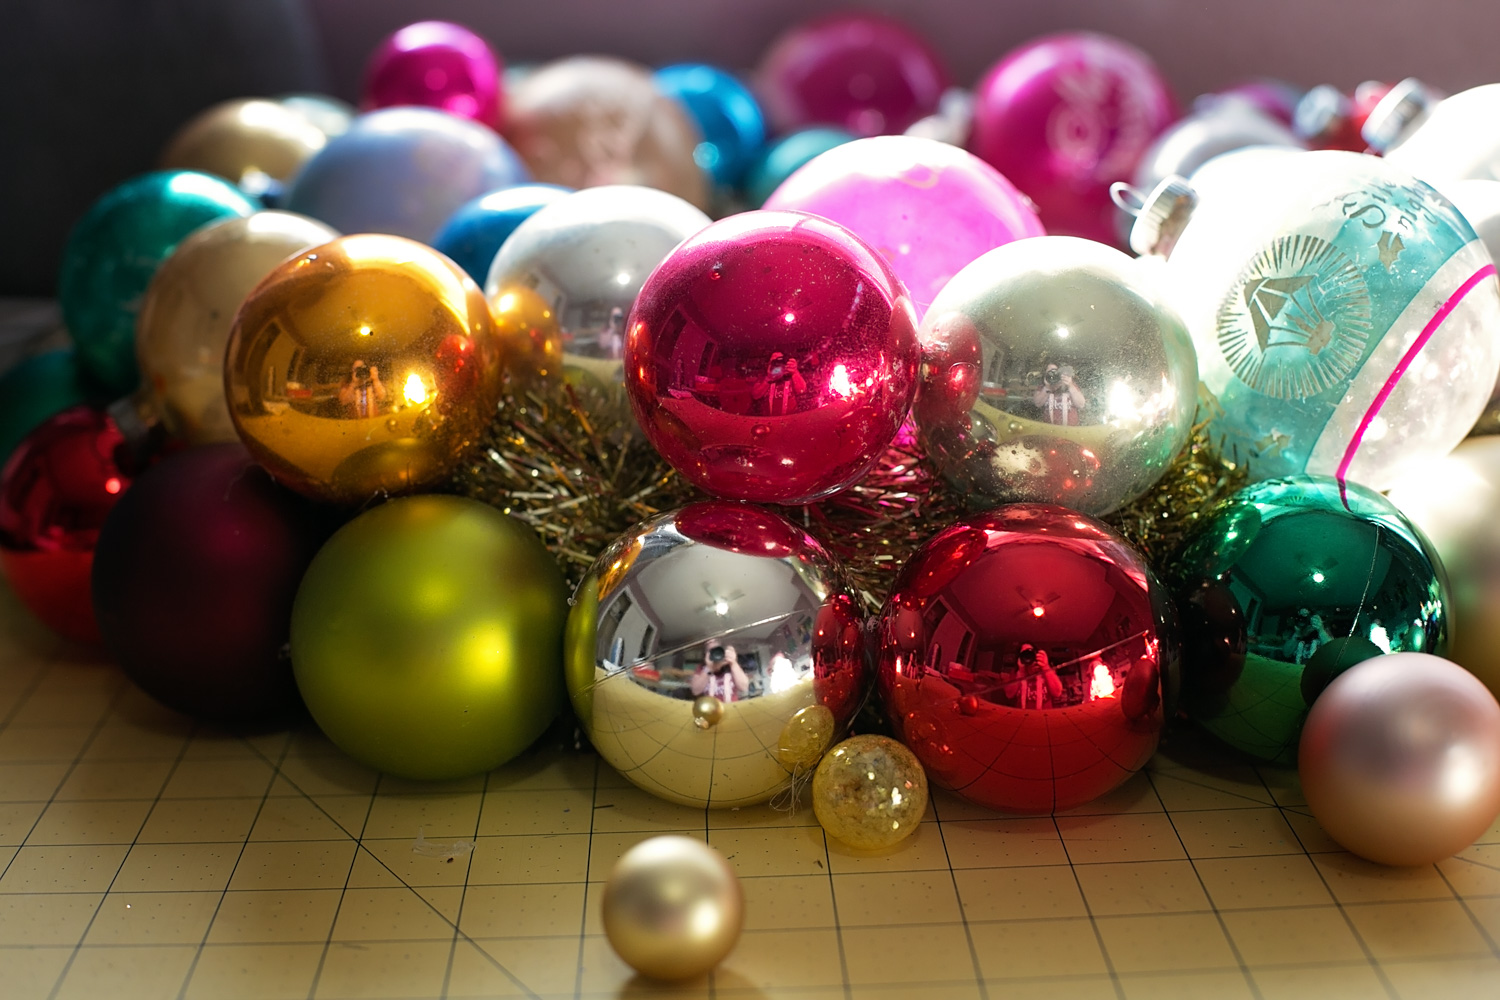
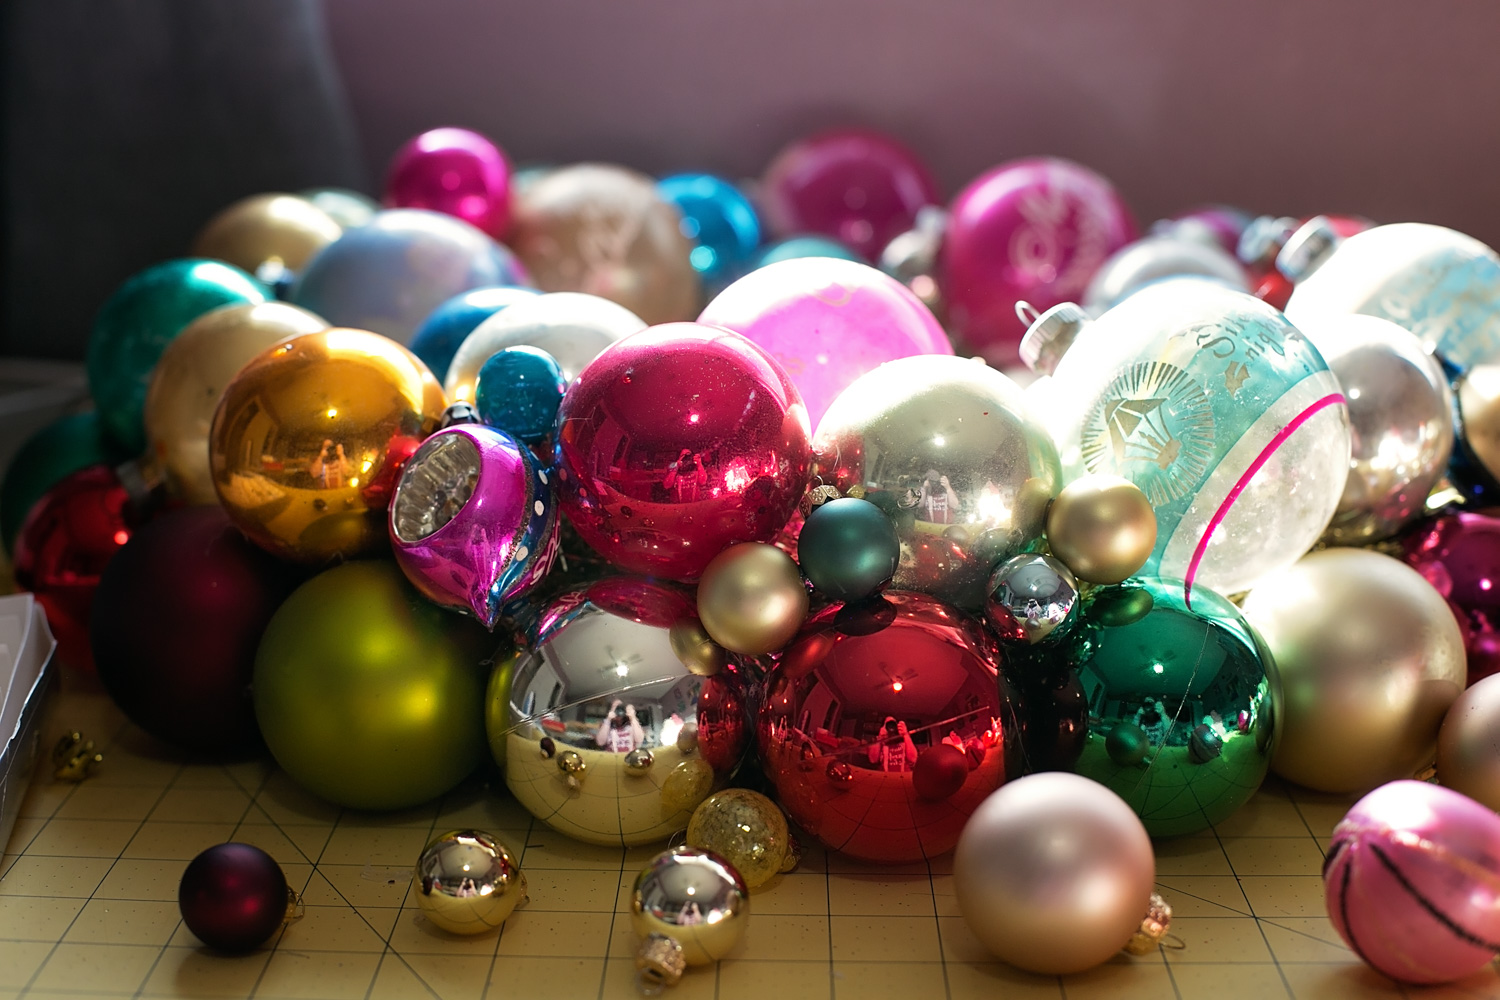
A variety of ornaments. Various shapes, sizes, colors, and sheens. You will want a bunch of small and tiny ones. I always shop the Christmas sales at Michaels, Target, Joann, etc. You can get those great big boxes of color coordinating ornaments for just a couple dollars if you take advantage of the sales and coupons. You will need more than you think!
Tinsel. It will take two packs to wrap a wreath. The color is up to you, but I usually lean towards gold.
Ribbon. This will be used for hanging. Make sure it is a nice, heavy duty ribbon. I like the wired style to give it a little extra strength.
Glue gun and a lot of glue sticks
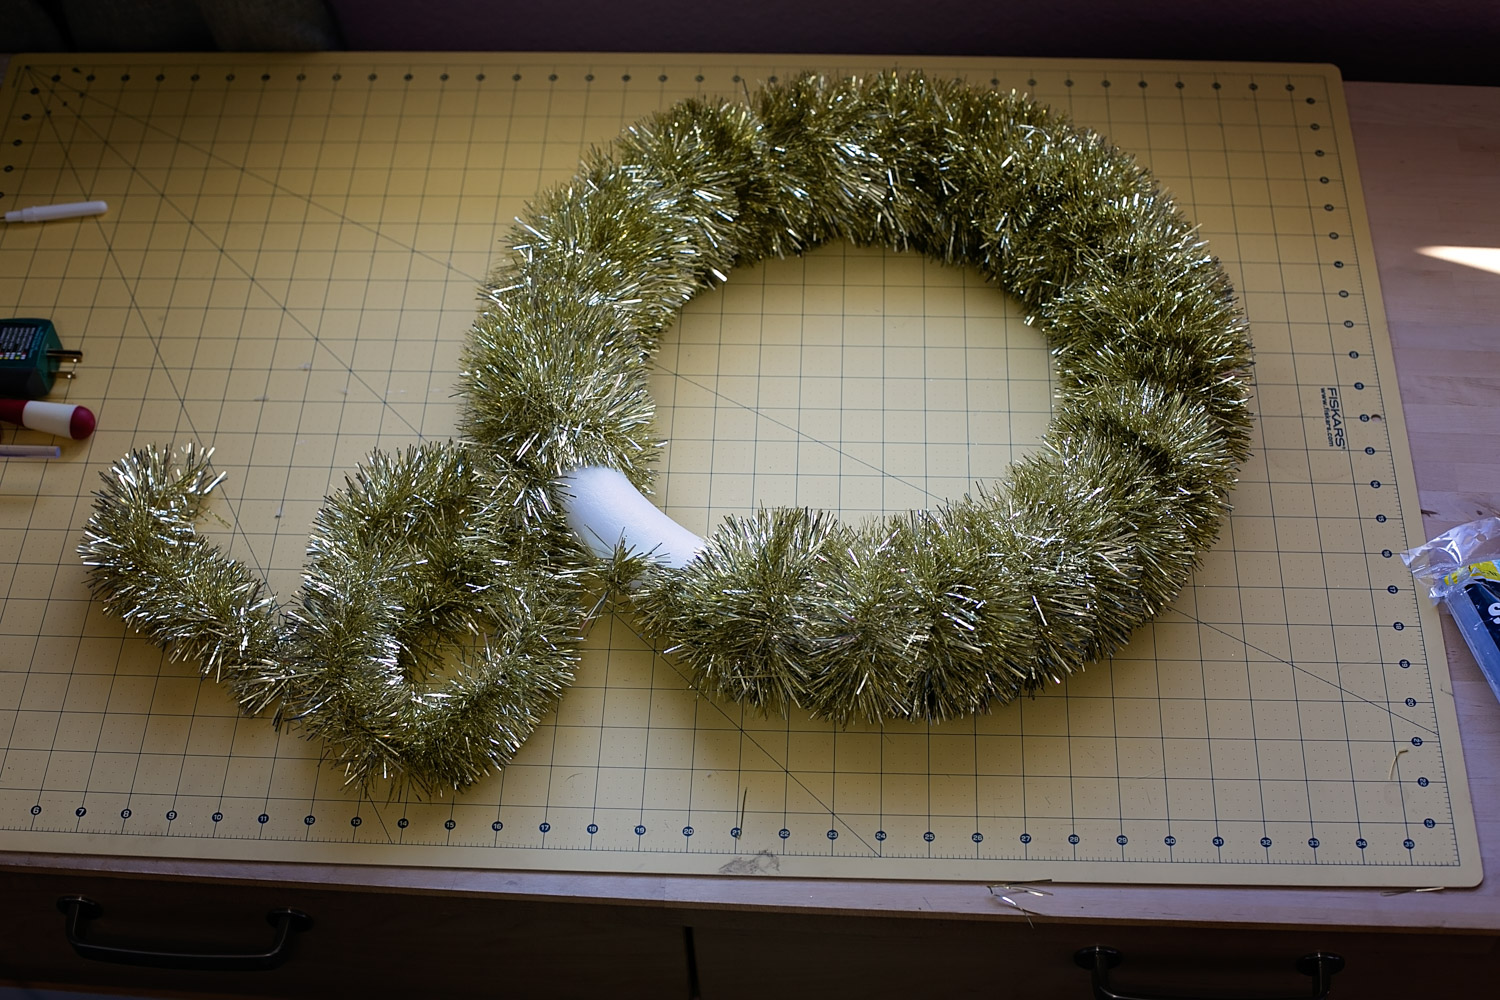
Styrofoam wreath form. The size will depend on how big you want to make it. These come in both green and white and they are the same. Make sure it is the smooth, dense foam one and not the light crumbley one.
Step 1:
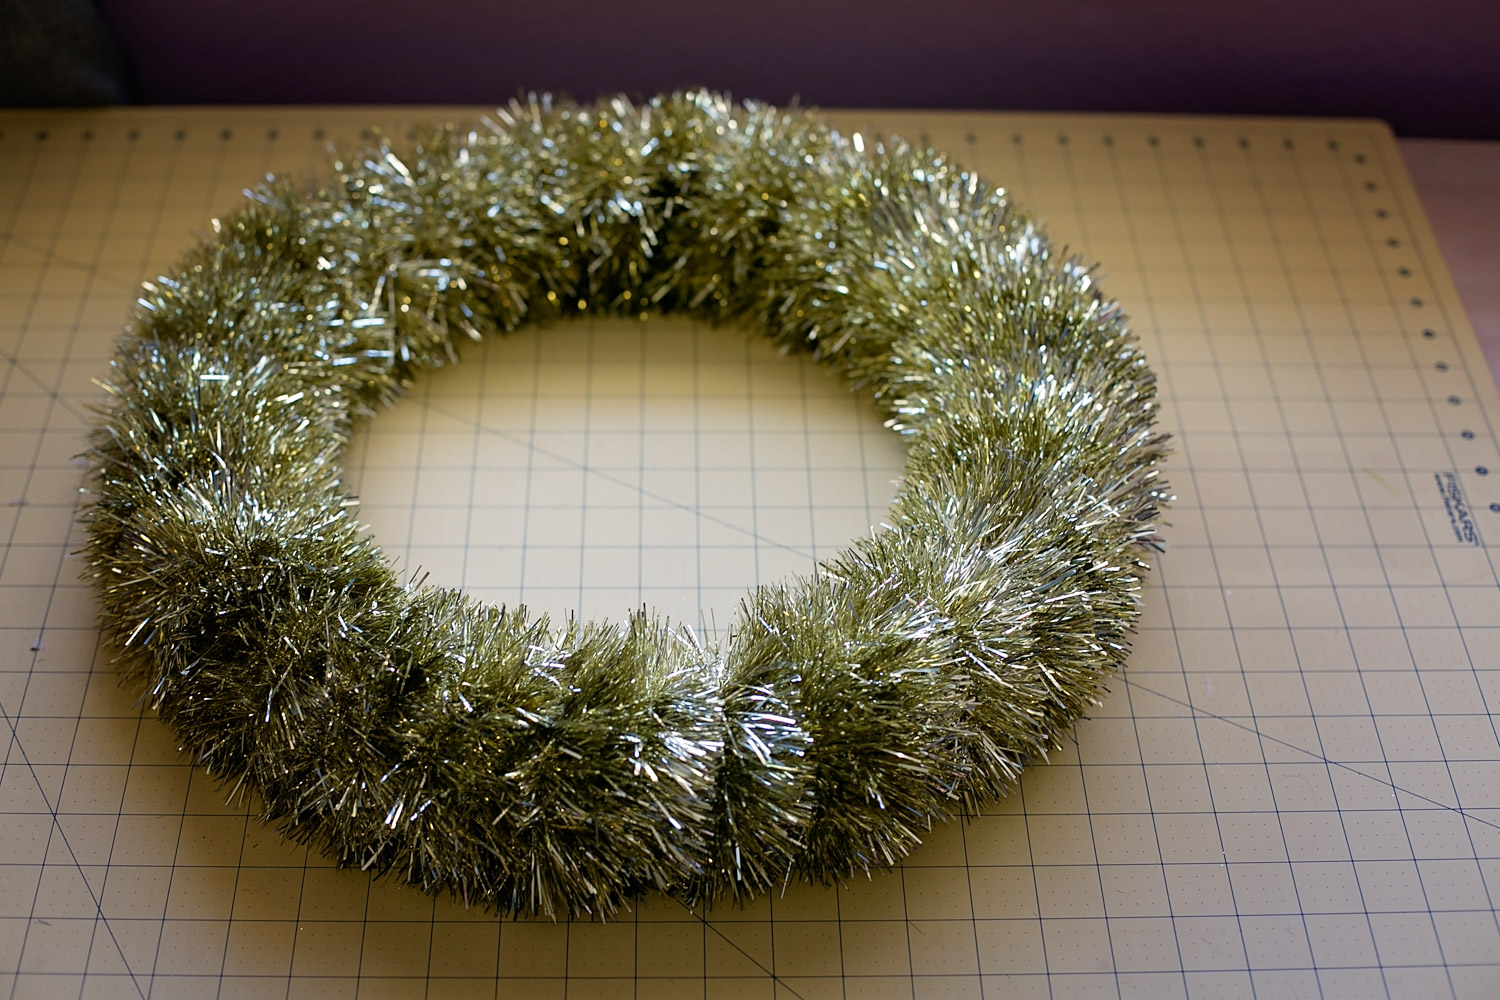
Wrap the wreath form with the tinsel. Add hot glue every few wraps to make sure it stays in place. The tinsel will provide the perfect bed for your ornaments.
Step 2:
Cut your ribbon about 36 inches. This will be personal preference on how you want your wreath to hang. Keep in mind that there will be ornaments making the wreath even bigger. Place the ribbon like this and add a little glue to keep it in place.
Place the ribbon face down on the back side of the wreath.
Wrap the ribbon around and glue in place. The wreath will be heavy, so make sure you add enough glue.
Step 3:
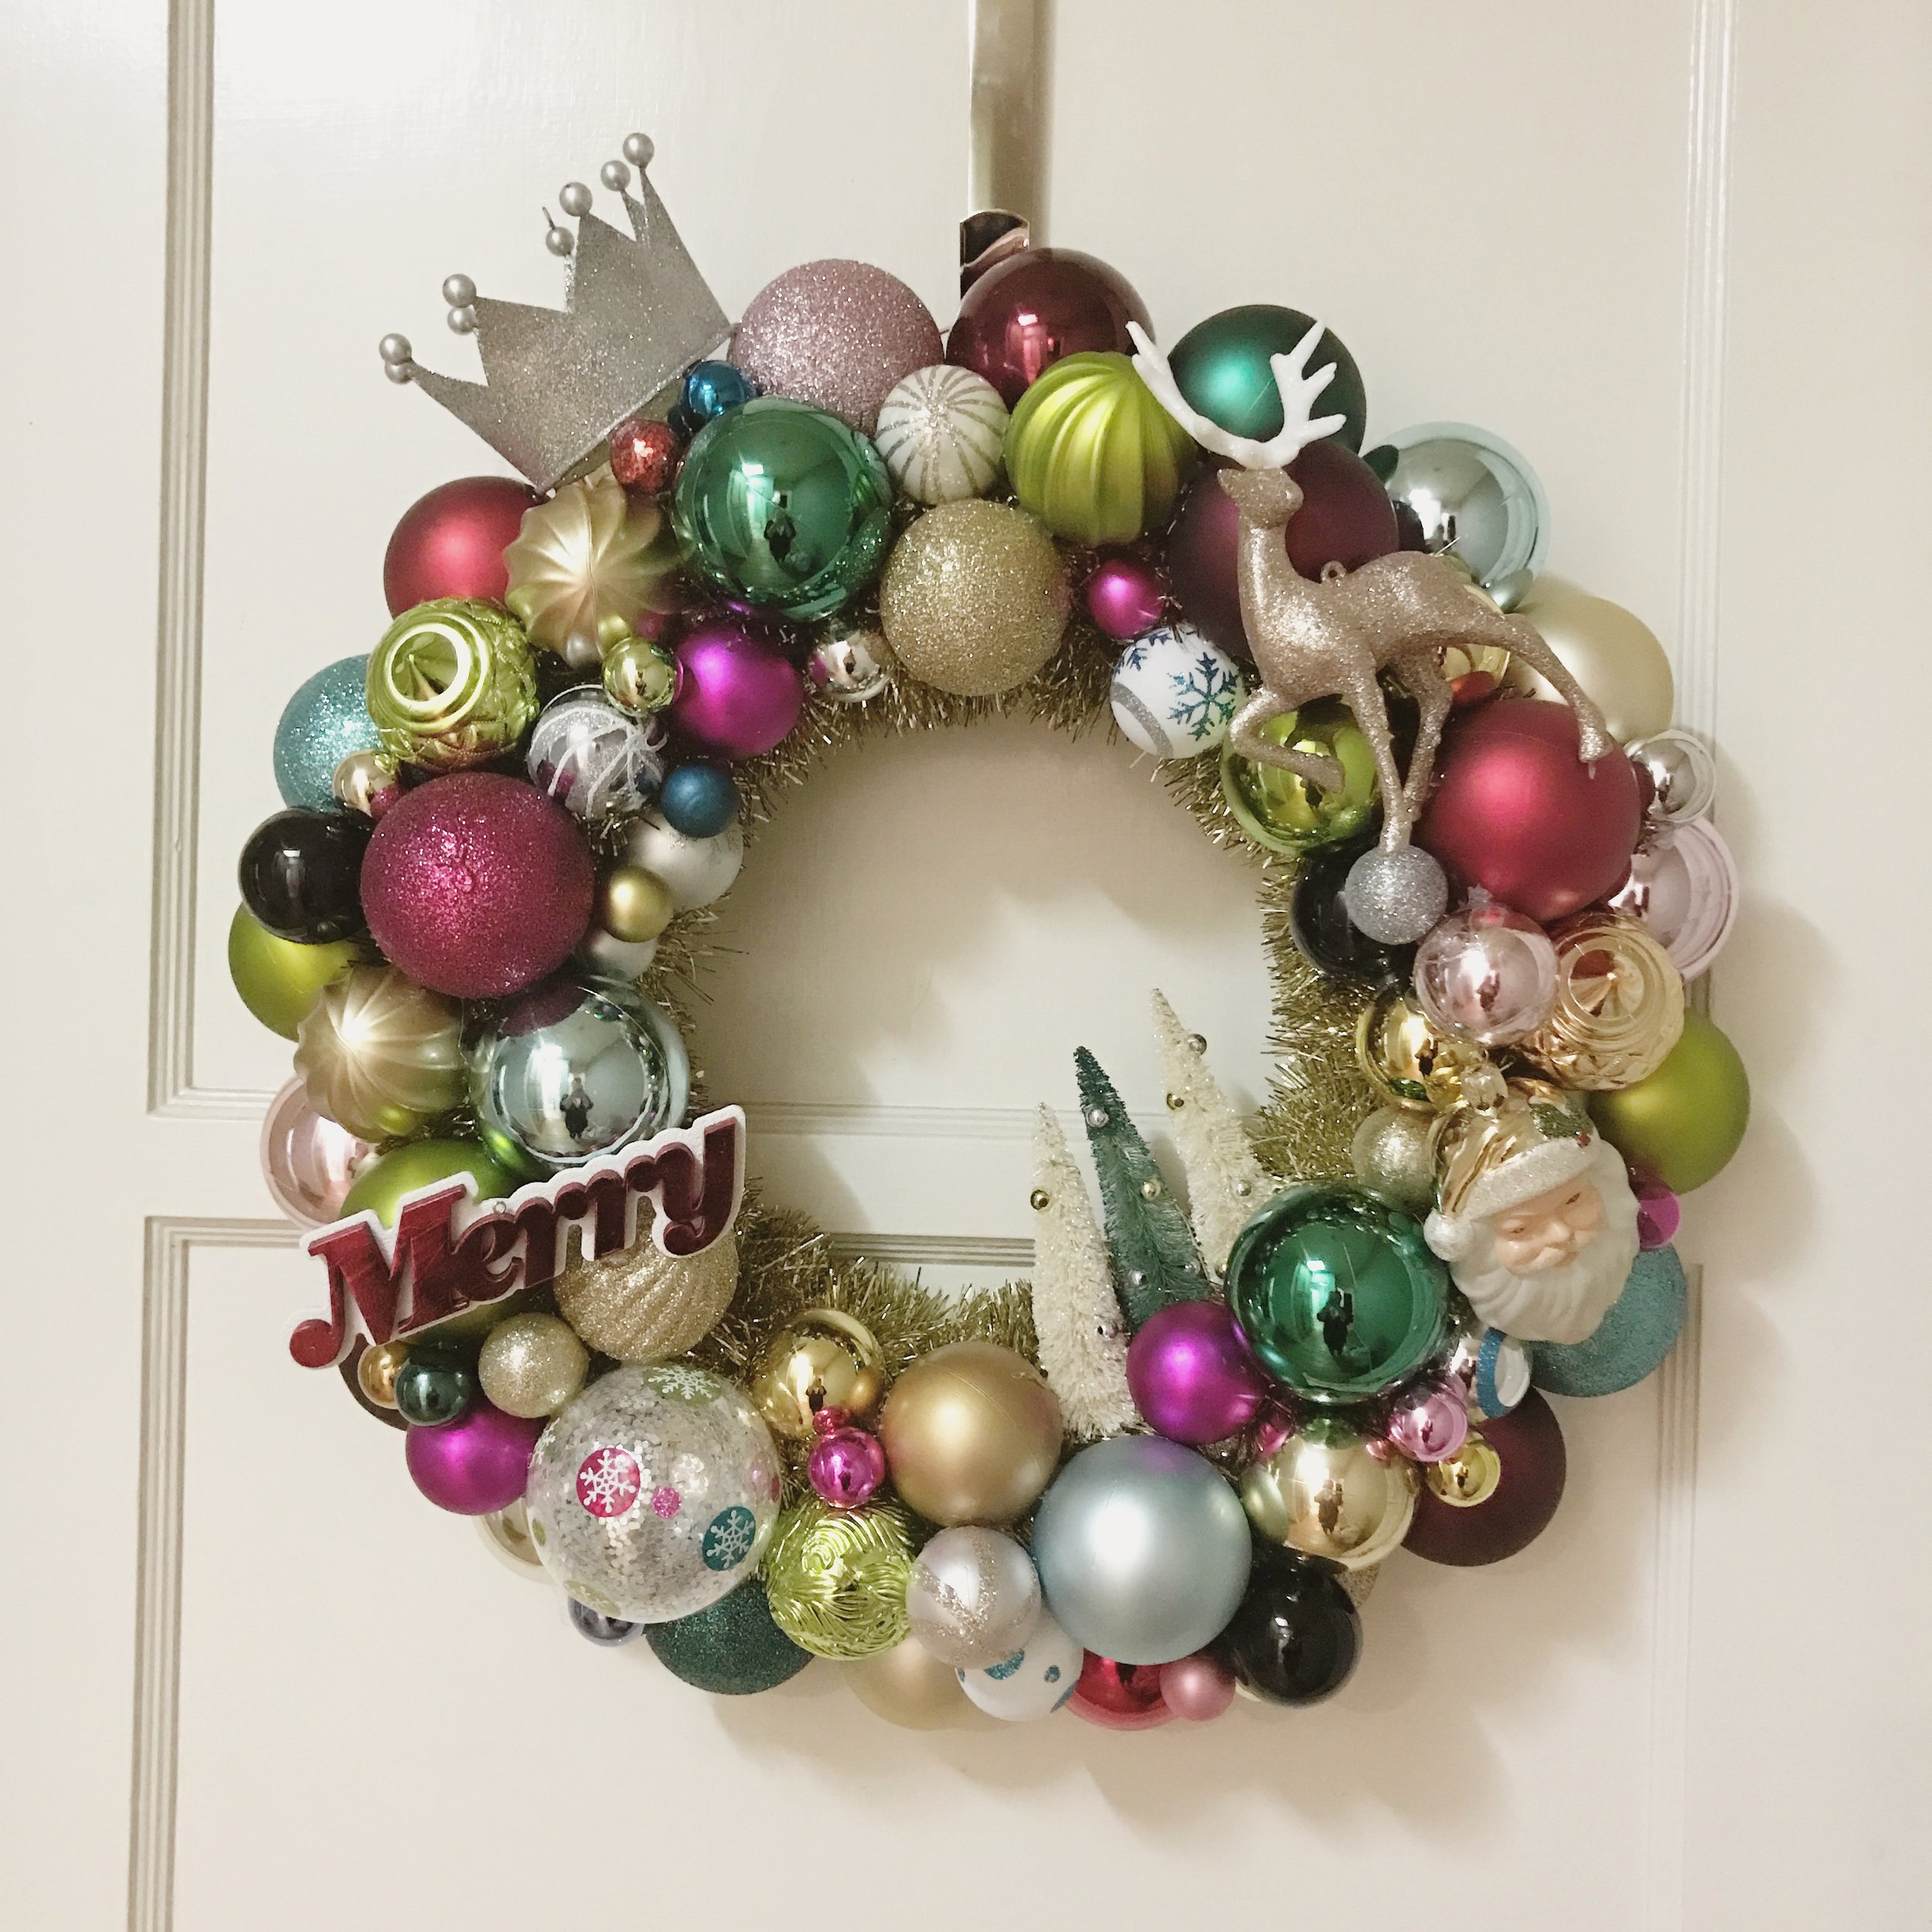
Ok, time to start the fun part. Take a bunch of your ornaments and start creating a ring around the wreath. If you want to add some to the inside, go ahead and do that. For this wreath I chose to do that. On my others, I did not. I like to have all these ornaments be the same size to make the outside shape nice and uniform. When you are happy with the colors and placement, glue them in place. Because I want the vintage ones to be the stars of the show, I stuck with my newer ones for this part.

Step 4:
Start placing your other ornaments on the wreath and glue them down when you are happy with the placement. I personally like having the hangers show on some of them because It looks more Christmasy to me, but they look just as nice if you don't have them show. You will end up having some holes and blank spots, and this is ok!! We will take care of those next. When I place the ornaments, I like to let them tell me where to put them. If they have words, I want to read them, If they have pictures, I want to see them. If I do a wreath with ornaments that aren't round, I want them to face the right direction.
When you have the main ornaments glued down, hang the wreath to make sure you have it looking the way you want it.
Step 5:
Now that the main part of the wreath is done, it is time to start adding in those smaller sized ornaments to fill in the holes. Again, this is all personal preference. For this wreath, I wanted it to look nice and full. For other ones, I just added a few and left a few gaps.
At this point, you should be pretty much done. You can add a bow, or a little Merry Christmas cut out, or any other little thing you might have. For this one, I didn’t want to add any extras.

Step 6:
Hang your wreath up and enjoy!!
Tips:
Before you decide on the size and the height, decide how you are going to store it. It is fragile! I have found that sometimes they can be too tall for the standard wreath holders.
Make sure you add plenty of glue. If you feel an ornaments wiggling around, add more.
Look at it from different angles and heights to make sure it looks right.
Stock up on ornaments during the sales! You can use different colors for different holidays.
Save some ornaments because there is always the possibility that one will break while it is in storage.


Today Shae is teaching us how to make beautiful wreaths with ornaments! Happy Crafting.