
{Tutorial} Add a Drawstring to any Yoga Waistband!
/***This tutorial features the Aviator Pants by Winter Wear Designs, but can work for any Yoga waist pants.***
Is there anything greater than a yoga waistband? Their comfort cannot be beat! And more importantly: both kids give them two very enthusiastic thumbs up. (Which makes them sewing-mom-gold, amiright?) But there's one problem...
Make that two problems. Two skinny minnies, with their teeny tiny waists, who usually need a size smaller waist band just to keep their clothes over their tooshies!
But smaller waistbands mean more stretching as I sew, and more stretching as I sew means super ugly puckering. What's a girl to do??
Add a casing and a drawstring, that's what! And if this plight sounds familiar, read on dear friends. I've got a tutorial in store for you!
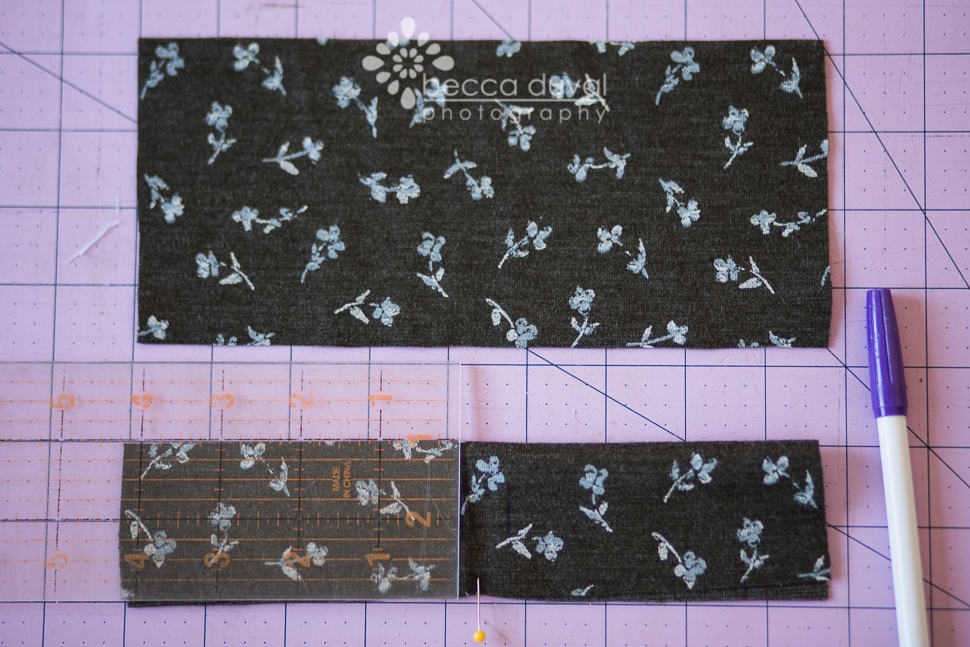
- Cut your yoga waistband, adding 1 inch to the length for extra seam allowance. 'Cause in the next step, we cut that waistband in half length-wise.
- ....Cut that waistband in half length-wise.
- Fold one half of your waistband down, and use a pin to mark the center.
- Mark a button hole 1/4 inch on either side of the center mark. "What size button hole??" you ask? Well that all depends on the size of your waistband. With this 4 inch waistband I marked a 3/4 inch long button hole.
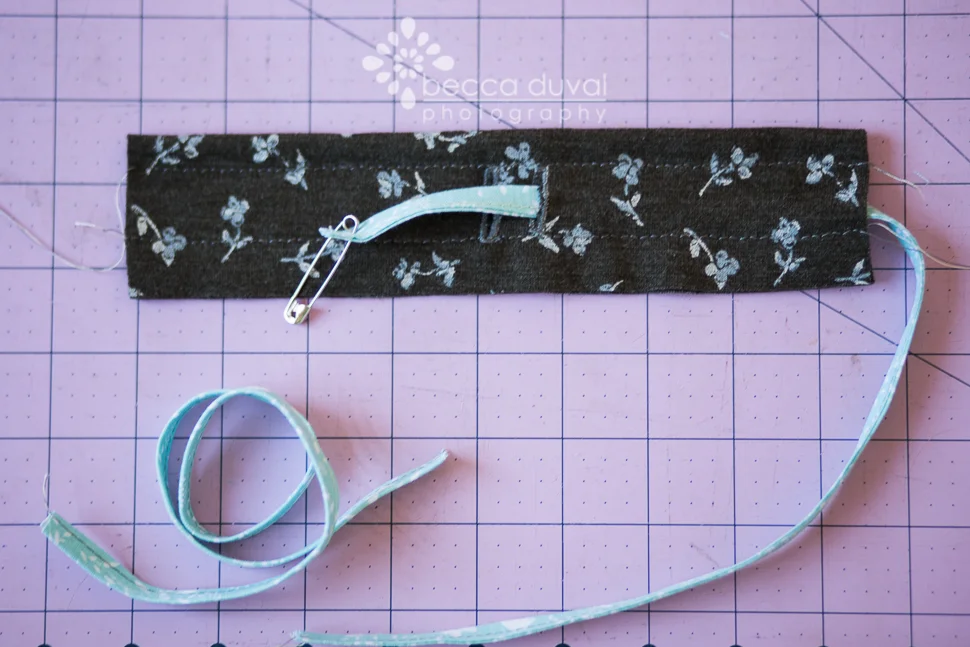
- Unfold the waistband, and interface behind the button hole marks. I didn't, and I got wonky shaped button holes.
- Friends don't let friends button-hole knits without interfacing.
- Add your button holes.

- Mark a channel for your drawstring. The IMPORTANT part here is to add a line of stitching high enough from the bottom of your waistband that the knit will still stretch fully all the way across the front of your garment. I was safe with marking 3/4 up from the bottom of the waistband. My top line of stitching was 1/2 inch away from the fold.

- Sew those casings with a zig zag stitch. They've got to stretch!
- Make two drawstrings. I cut two 1.25 inch strips of fabric, selvage to selvage, and enclosed the raw edges like I was making my own bias tape. (If you're doing the math, you might think two 42 inch drawstrings are a big long for the job... and you'd be right. I cut them to size after I tie them on the wear-er. I'd rather have them too long than too short, yeah??)
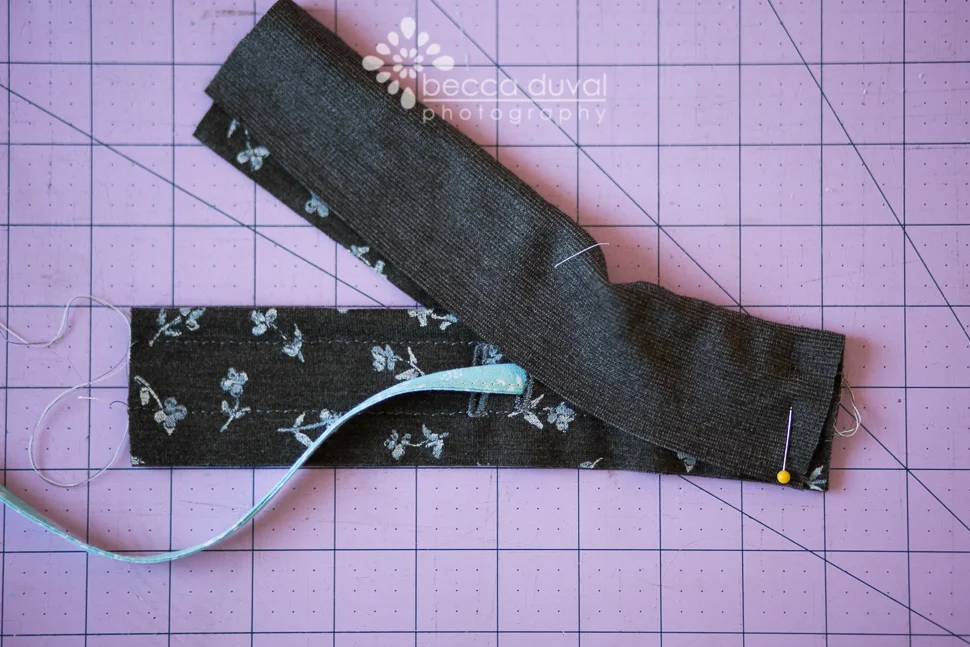
- Feed the drawstrings through each channel, and pin the drawstring in place at the side of the waistband.
- Take the back waistband piece and fold it right-sides-together overtop of the front waistband. Sew, and repeat on the other side.
- Your waistband is complete! Stitch it to your garment per pattern instructions.

These are my daughter's aviator pants by Winter Wear Designs. PERFECT playwear!


And with the addition of a draw-string fitted waistband, these pants will stay put.. through playtime jumps, tumbles, and sprawls!

Ta da!!


