
Little Lizard King Sew A Long Day 3
/Yesterday's Accomplishments

Welcome back to the third day of the LLK/Pattern Revolution Sew-A-Long. We hope you are as excited we are!
Don't forget that Team Lizard is offering a free pattern at the end of this Sew-A-Long to three winners in three different categories.
Don't forget that Team Lizard is offering a free pattern at the end of this Sew-A-Long to three winners in three different categories.
1. Participant Favorite
2. Team LLK Favorite
3. Random drawing of each person who posts a photo of a completed project.
Today we'll cover steps featured on pages 13-15. For a fun option (or if you are short on fabric), use multiple fabric pieces for the skirt. To do this, keep the length of the fabric the same, but cut more than two pieces for the skirt.
Just make sure that the final skirt width equals the total skirt width in the measurement chart, including seam allowance. i.e. If the pattern requires you to cut two skirt pieces that are 18" long x 24" wide and you want to use four pieces for the skirt. Cut four pieces that are 18" long x 13" wide. Use coordinating or contrasting fabrics. To do this, divide the total width by the number of panels/pieces desired, and add a bit for seam allowance.
Regardless of the number of pieces used in the skirt, place the pieces right sides together and sew to attach.
This is also a great place to add decorative trim. Pom Pom trim is a cute detail on the bottom of skirts (if you don't have a cat!). Alternatively, add jumbo rick-rack, lace, or ribbon a few inches from the bottom edge around the entire skirt for a fun effect.

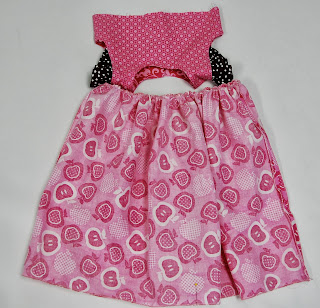
Gather the top edge of the skirt to the width of the bodice.
Quick question: What is the LLK preferred method of gathering?
Poll: How do you gather? Serger, Ruffler foot, Zig zag method, basting stitch/tension?

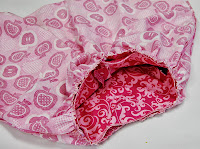
Turn the skirt inside out. Keep the bodice right side out and upside down.

Slide the bodice inside the skirt, keeping right sides together. Align the bottom edge of the bodice with the top edge of the skirt. Distribute gathers evenly. Pin to secure and sew to attach.


Turn the dress right side out, top stitch directly above the seam line connecting the skirt to the bodice, and hem the bottom edge of the skirt.
Set aside.
If you are sewing-along with us, please post photos of your Fairy Fluter album. We'd love to see your fabric choices mid-construction or your dress upon completion. Our facebook group is here: https://www.facebook.com/groups/582456251788674/
Come back tomorrow for Day 4 when we complete the dress using pages 16-19 of the pattern!


