
Back to School in Style: Free Motion Applique
/Today we are looking at an embellishment that is taking the sewing world by storm - Free Motion applique, or FMA, gives your creative outlet a new lease on life as you essentially get to 'sketch' on fabric with your sewing machine. This is fun and free form, and has few rules; so you really get to create in your style to end up with unique garments for your children's clothing and your own!
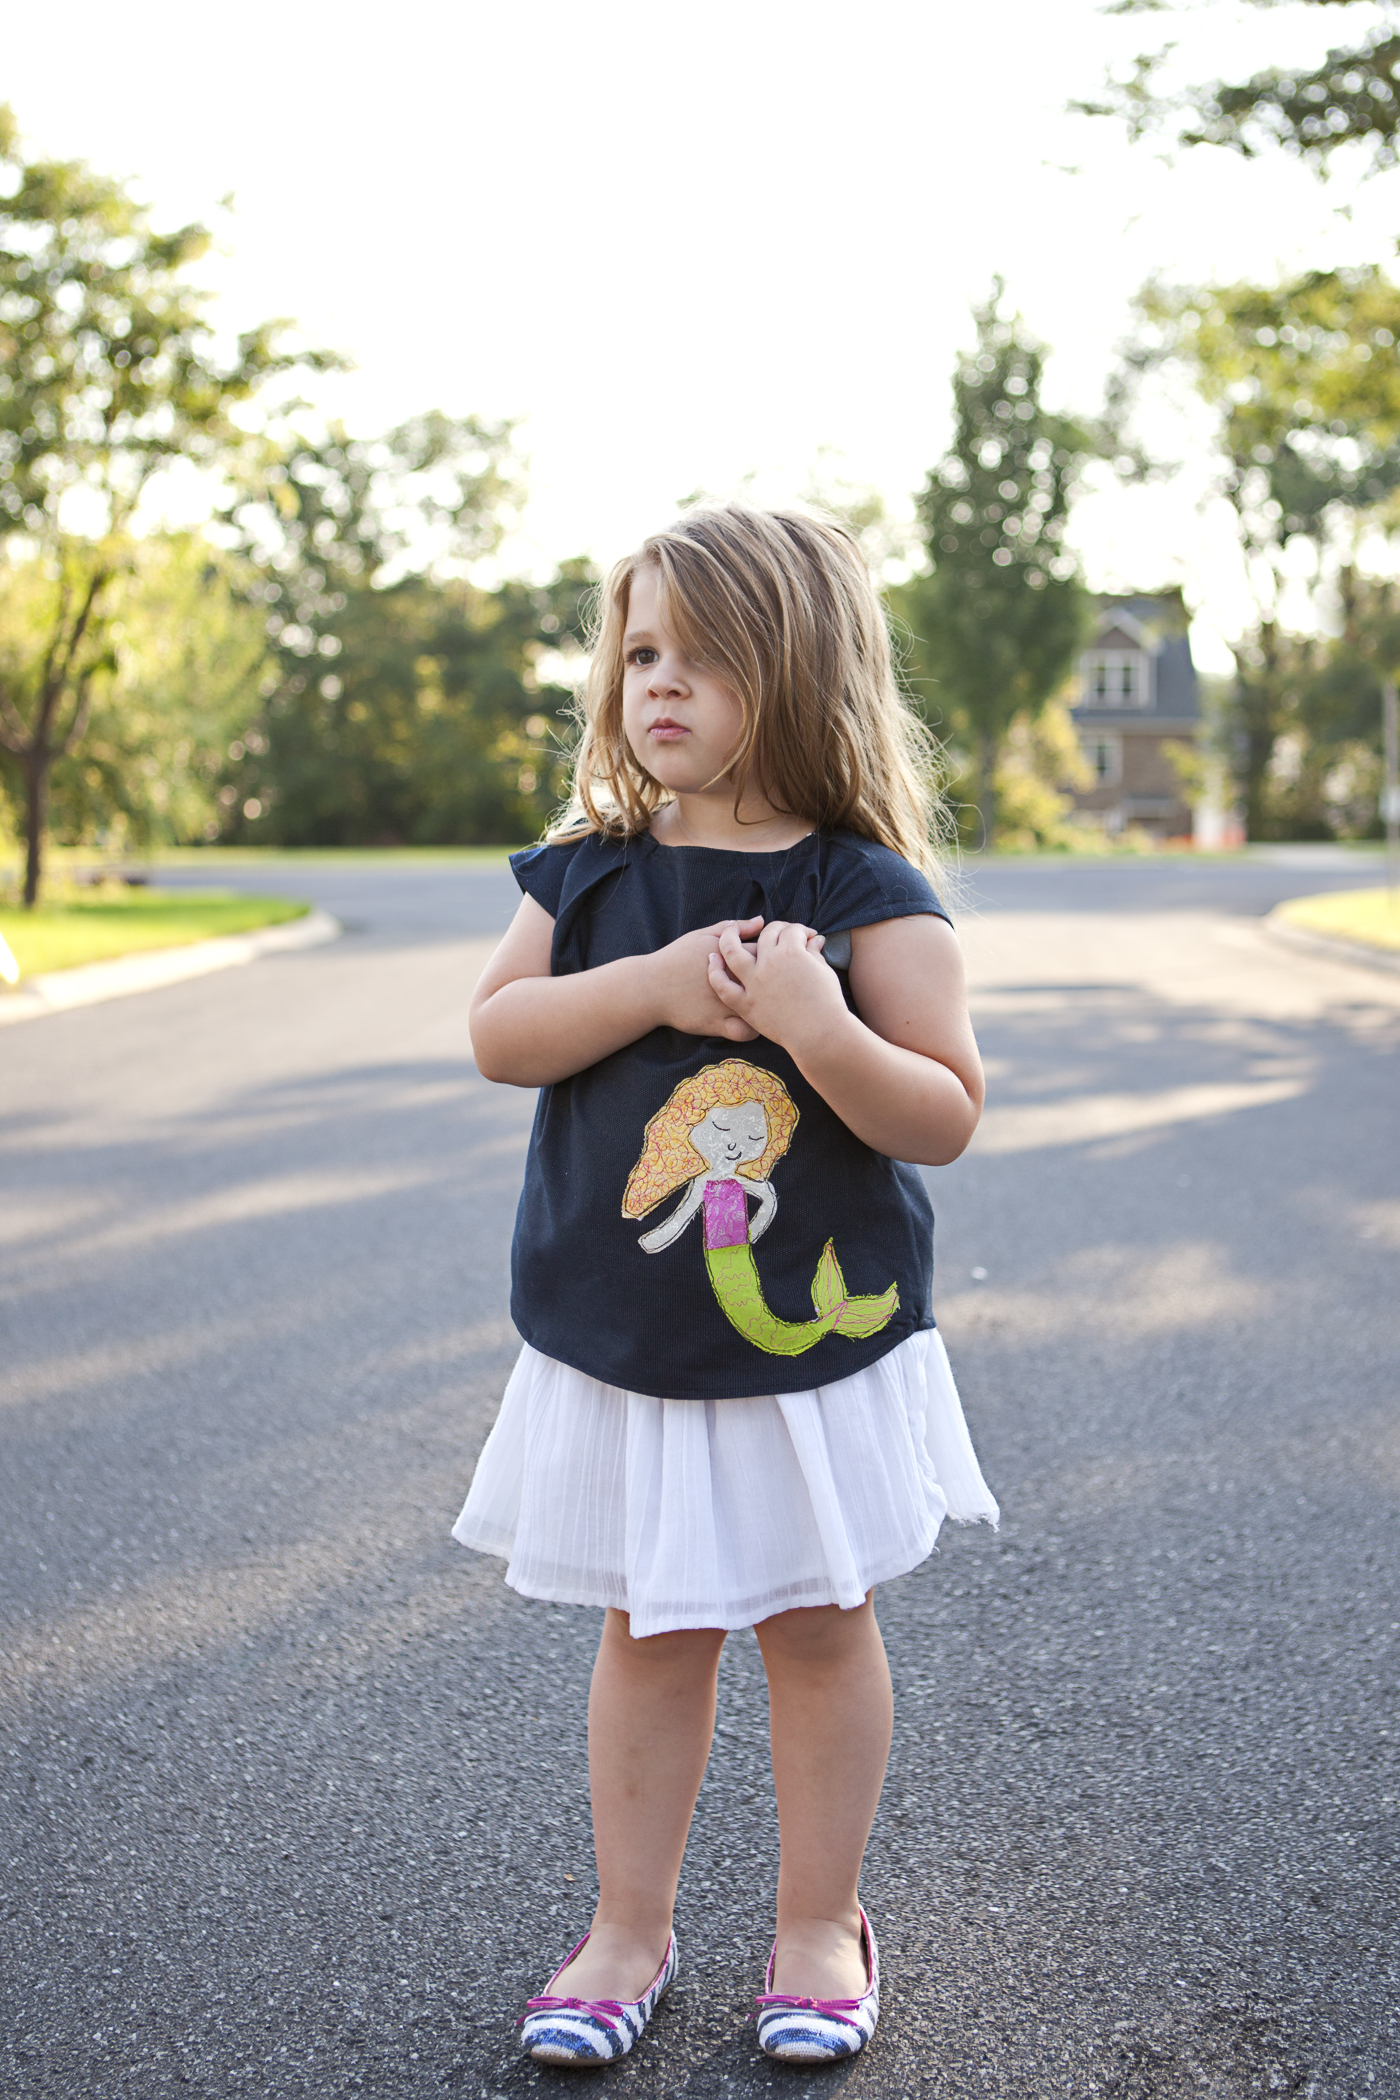
I first fell in love with Stitch Art's Molly the mermaid, and I'm working on some designs that will release soon from Winter Wear Designs. (Princess pictured below and the Bus in Raedene's post).

Now here is Raedene to help you fall in love with FMA!!!!!
--------------------------
What is free motion appliqué you ask? That is exactly what I wondered when I first heard the terminology. I have appliquéd with my sewing machine and fabric shapes a ton of times with heat and bond and a zigzag stitch? I have used my embroidery machine to do appliquéd whales and monograms galore. So how is this different than those techniques? Well, I have learned that this is a way to combine the concepts of BOTH. For those of you who do not have an embroidery machine or the $$$ to purchase one, this is a fun, creative alternative. All you need is a free motion foot, heatnbond, and cutaway stabilizer. A basting spray to help bond the stabilizer to the muslin is recommended also.

The design is provided in the pdf template and each "layer" is separated to allow you to do the steps. My friend Jeanine from The Crafting Fiend created a video to help you too you can find it here: VIDEO
This is the basic how to:
trace the shapes of the design onto the paper side of the heatnbond
choose fabric scraps for each of the shapes as desired
iron on the heatnbond bumpy side to the wrong side of the fabric
lay out all the shapes as desired/described in the pdf onto the muslin
peel off the paper backing on the heatnbond and lay the pieces down
iron on the right side of the fabric allowing the pieces to stick to the muslin
spray basting spray onto the wrong side of the muslin and stick to a piece of cutaway stabilizer covering the design
attach FMA foot to machine and stitch out the designs on the inner part of the template; leave the outline for attaching the design to the final product
cut out the design from the stabilizer/ leftover muslin and then iron it on to heatnbond again for attaching to a final product
stitch around the outer design for final attaching. Use black thread or I really love variegated thread for a creative look of mixed colors throughout allowing you to move from one fabric color to the next.
You are finished!
I have made a few designs in the past week. My first attempt was using StitchART by a sewing friend, her shop The Crafting Fiend and her Molly the Mermaid. Isn't she so sweet?

I then wanted a design for our upcoming trip to Dollywood amusement park and so I freehanded a ferris wheel design to use on the girls dresses. Here is a good example of where I used variegated thread in pastels and it is hard to see the "sketching" from far away. So you may prefer a darker thread to get the desired look.


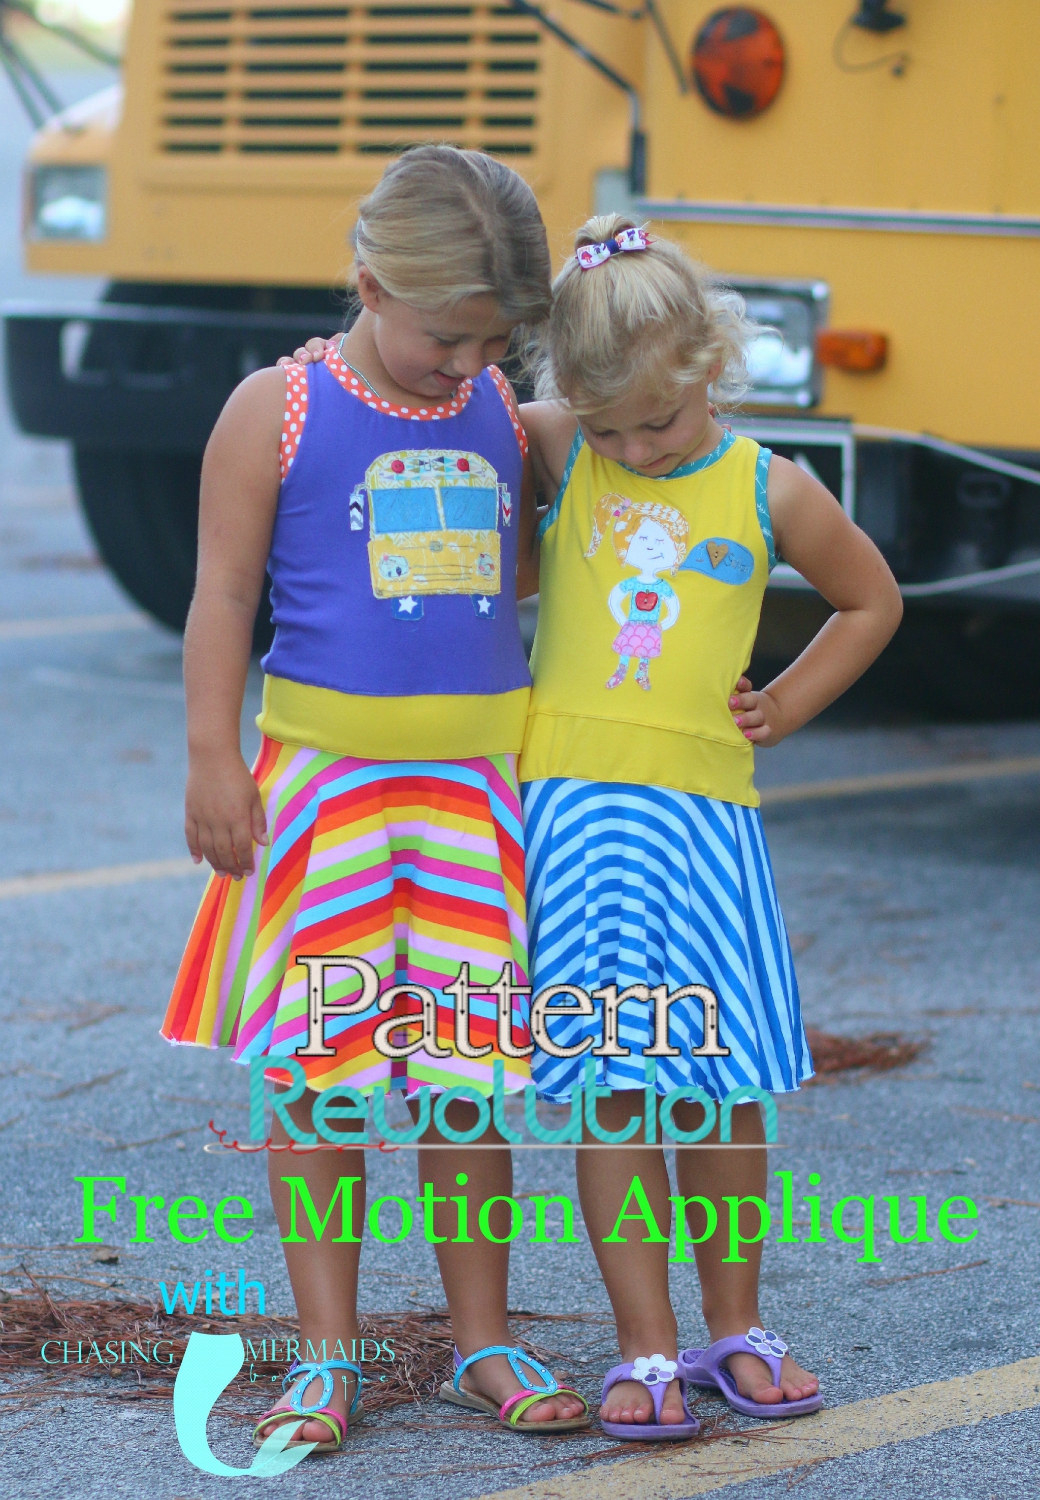
Back to school is right around the corner and I wanted something unique for their dresses. I used a school bus template by Winter Wear designs for my older girl's dress. This one was fun because there were a lot of areas that needed "sketching with thread" to create the bus look.

And finally I took a design by The Crafting Fiend and her other StitchART that is called "Charlie the Veggie Girl" but I turned her into "I love school girl" instead!!! I added an apple button on the dress and a heart button on the text bubble to add a creative sewing flair!

And the dresses you ask? This pattern is called the charliemackadoodle and it is designed by The Burlap Button you can find on etsy! This pattern is a favorite of my girls as you can see and it is a quick sew and a perfect template for FMA designs!


